*This is a photo heavy post!
Initially with this cake I had planned to try to find a
recipe on the internet because I didn't have a whole lot of time to make it and
I didn’t want to try developing a new recipe in such a short time frame. I needed a birthday cake for my 12 year-old daughter Erika,
who eats mostly gluten free (due to possible intolerance). After searching, I couldn't find one I wanted to
make. I found mostly cupcakes.
So I decided to go ahead and develop a cake recipe anyhow. And
then I decided to take pictures the whole way through in the hopes that it will
make it easier for you to make. (Because when you have no time, make the job
harder, haha)
I’ve since used this to make a mini cake with three 6-inch layers.
It works well and makes a very tall (cute!) cake with the smaller pans.
I haven't tried it as cupcakes yet, but it's next on the
list.
Recipe at the bottom of the post, as usual.
STEP BY STEP
****************************************
So to start with, preheat your oven to 350 F.
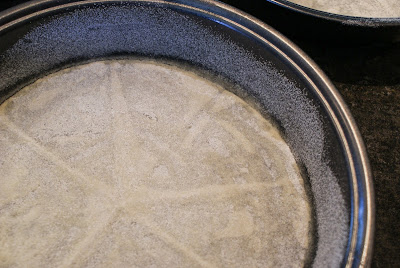
Prepare baking pans.
I used three 8 inch rounds.
To make parchment circles fold a square of parchment in half
and then again and again until it is a triangle shape. Hold it with the pointy part in the middle of
your upside down pan, and then cut along the edge of your pan, following its
curve. Unfold and you should have a
proper sized circle.
Spray your pan. Add parchment.
I then spray the pan again and flour it (I use white rice
flour).
To make the batter, add the room temperature butter and the
sugar to your mixing bowl. (I used a Kitchen Aid Stand mixer, but I can’t see
why this wouldn’t work with any other stand or hand mixer, or by hand with a
wooden spoon and strong arms.)
Cream butter and sugar together until the mixture is pale
yellow and fluffy.
Add eggs, one at a time, mixing in between.
Combine buttermilk with vanilla extract and vanilla bean
paste.
Weigh flour. (Add xanthan gum if using)
Add salt…
And baking powder… And mix together.
Add half of the flour mixture to the bowl and mix until
combined.
Add buttermilk mixture to the bowl and mix until combined.
Then add the rest of the flour and mix one final time until
combined.
Pour the batter into your prepared pans, weighing for
accuracy.
Spread out with an offset spatula or spoon.
Bake for 45 minutes or until golden brown on top and a
toothpick comes out mostly clean from the middle of the cake.
Let cool in the pan for 15-20 minutes, and then move to
baking rack to cool completely before icing and building your layer cake.
Here is a photo of my decorating in progress.
I made a cake with a winter theme from the movie
Frozen. My Olaf looked a bit crazy but it’s
ok because my daughter loved him. I made
buttercream and marshmallow fondant to decorate the cake. I only have iPhone
photos of the finished cake, because I “food-blogger-failed” AGAIN and forgot
to put my memory card back in my camera. Ugh.
Here are those photos.
Anyway, I hope this post inspires you to try this recipe. If
you do, let me know how it turns out and please share photos!!!
Thanks,
Jacqueline.
Very Vanilla Gluten Free Birthday Cake
Light & Airy Gluten Free Vanilla Cake

Prep Time:
Cook Time:
Yield:Three 8-inch Layers
Ingredients:
- 350 grams Gluten Free Flour Blend
- 1 teaspoon xanthan gum, only if your mix doesn’t include it
- 1 tablespoon baking powder
- ½ teaspoon salt
- 4 large eggs
- 227 grams (1 cup) butter, at room temperature
- 2 cups sugar
- 1 cup buttermilk*
- 1 tablespoon vanilla bean paste
- 1 teaspoon vanilla extract
Instructions:
*Don’t have buttermilk in the fridge? That’s ok, just add a tablespoon of white vinegar to a one cup measuring cup and fill it up the rest of the way with milk. Wait 5 minutes before using.
- In a small bowl, combine flour with xanthan gum, if using. Add the baking powder and salt. Set aside.
- In another small bowl combine buttermilk with vanilla bean paste and extract.
- Cream together butter and sugar until light yellow and fluffy.
- Add eggs one at a time, mixing briefly after each one.
- Add half of the flour mixture and mix to combine.
- Add all of milk mixture and mix to combine then add the rest of flour and mix until combined.
- Batter will be thick. Divide into prepared baking tins, weighing for accuracy. (Mine weighed about 715 g each)
- Bake at 350 for 45 minutes or until golden brown on top and a toothpick comes out mostly clean from the middle of the cake.
- Let cool in the pan for 15-20 minutes, and then move to baking rack to cool completely before icing and building your layer cake.


No comments:
Post a Comment